Sunday, March 3, 2013

Easy Peezy Peanut Sauce

The Single Serving
Peanut Sauce- one of cooking's best kept secrets. The sauce takes less than 10 minutes to create and you can use it on any number of dishes. I actually discovered this recipe while I was in South Africa (not South African by nature, but when you don't have an oven or a stove top, you have to get crafty).

Table Mountain Conquered!
I use this whenever I am out of ideas and I have some noodles or pasta lying around. I do prefer it it with stringy types of noodles like udon or lo mein noodles. My dad just got me this nifty little cast iron sauce pot, so this was its maiden voyage.
The Ingredients
Press that garlic hard
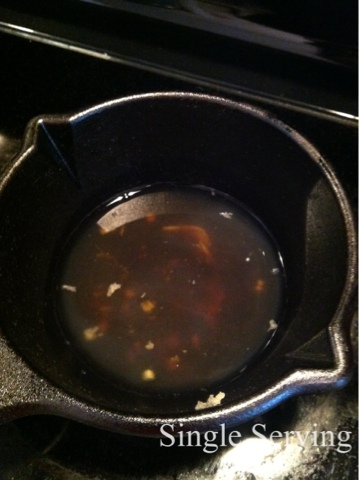
looks murky
Add the peanut butter
It's melting!!
All mixed and ready to go
Peanut Sauce Recipe:
     Ingredients-
    1/3 cup or two big scoops with a soup spoon, peanut butter
    1 clove, garlic (pressed or chopped)
    2 tbs, lime juice
    2 1/2 tbs, soy sauce
    1/3 cup, water

How To-
Literally you just melt the ingredients together over a hot stove top. On medium high, mix all ingredients except PB into saucepan. When it gets to be more hot, add peanut butter (this is just so that the PB starts to melt immediately) and keep stirring periodically.  Within 5 minutes, all ingredients should be melted and you have a sauce!
Enjoy!

Thoughts:
I am actually getting hungry thinking about this sauce while I write this. It is super tasty and easy and goes with so many things.

Homemade No-Knead Beer Bread


So I didn't anticipate my first time making this bread loaf to be successful so I actually didn't take photographs of the process. As it was my first time making any bread recipe from scratch, I figured that I would have to make it a few times before I got it right for the pictures to be pretty enough to showcase. To my surprise, the loaf you see above was as pretty in person and tasted just how it was supposed to.
Original No-Knead Bread smothered in Brie and Jam
My friend Hannah (who inspired the Lentil-Kale-Chorizo Stew recipe here) gave me the recipe last time I visited her up North (I like pretending she lives in Winterfell) which I believe she got from her mom (who I can say with certainty that Hannah got her skillz from). Hannah bakes it a few times a month as I understand it, and that's because it takes almost no effort, and is a great go-to for fresh bread. Last time, we ate the entire loaf between the 5 of us and it was smeared with baked brie and raspberry jam (heaven!). I don't live near any bakeries unfortunately, well at least any worth their weight in dough, so I am always at a loss when I want to find a fresh baguette or the like for an indulgent moment. I ended up eating a few slices and freezing the rest for a rainy day.  For the first time since Lent started, I am glad I gave up cheese or I would have had a hard time resisting the urge to spread brie all over the warm fresh bread.
Just out of the oven
 The reason I have the word 'beer' in the title is because it will pop-up more on google searches (alcohol is a motivator for people) but also because there is beer in the recipe. I used Yuengling beer (always a classic) and Hannah uses Rolling Rock. The recipe calls for a mild-lager but I am going to try experimenting the next few times I make it with other styles of beer- particularly wheat beer since that is usually what I have in my fridge. 
My two indulgent sample pieces
When I said this recipe requires very little effort- I wasn't joking. It only requires planning and time. The night before you want the bread, just prepare it and let it sit overnight. When you wake up, do the next step, and then 3 hours later, the actual baking process starts. Without all the waiting time, the process is only 45 minutes.
scrumdiddlyumptious
The Single Serving~
Homemade No-Knead Beer Bread Recipe: (Courtesy of Hannah F. )
     Ingredients- (Normally I don't include cookware but this is unusual recipe)
     Parchment Paper
     Plastic Wrap
     Non-stick cooking spray
     Dutch Oven (pot) - (make sure the handle on the lid is metal, not plastic, as it’s put in a very hot oven and handles will otherwise melt!) I use a Lodge Dutch Oven with metal loop handles (amazing!)
     10" skillet
&
     3 cups, unbleached all purpose white flour (plus additional for dusting work surface)
     1/2 tsp, instant yeast
     1 1/2 tsp, salt
     3/4 cup + 2 tbs, water
     1/4 cup + 2 tbs, mild-flavored lager (feel free to try others and tell me)
     1 tbs, white vinegar

     
How To-

NIGHT before you want Bread
In big bowl, whisk flour, salt & yeast. Add water, beer and vinegar.  Don't continue using the whisk but switch to a rubber spatula. Use the spatula to fold in the mixture, scraping up dry flour from bottom of the bowl until a shaggy ball forms. You might need a bit more beer at this stage to incorporate all the dry flour into the shaggy ball (so hopefully you didn't drink the rest of the bottle yet). 
 
Cover bowl with plastic wrap and store at a warm room temperature for 8 to 18 hours. I put mine in bowl when I got home from work and let it sit overnight.

3 Hours before you want bread

Lay a roughly 12 - 18 inch sheet of parchment inside 10" (or so) skillet and spray parchment with non-stick cooking spray.  

Transfer the dough to lightly floured kitchen surface and knead about 15 times. Shape the dough into a ball and transfer into the middle of the parchment paper in the skillet.  Quickly spritz the top of the dough with non-stick cooking spray and use plastic that covered the bowl overnight to loosely cover the dough on the parchment paper.  Set in quiet place, room temperature, to rise for another 2 hours.

Set the timer for 90 minutes. Adjust oven rack to second lowest position.  When timer goes off, put covered dutch oven (pot) into the oven and turn the oven on, set to 465 degrees. Reset second timer for another 30 minutes.

When 30 minute timer goes off (will have been two hours), uncover the dough ball (it should have risen) and lightly dust the top with flour. With a sharp knife, make a long slit along the top of the dough (and any other designs you may fancy).
 
Take the pot out of the hot oven (super hot-be careful!) and remove lid somewhere it won't burn anything. Pick up dough by lifting the parchment overhang from skillet and lower into hot pot.  Cover pot with lid. Parchment will hang out sides.

REDUCE OVEN TEMP TO 425 DEGREES and put covered pot back in oven. Set timer for another 30 minutes.

When timer goes off, open oven and remove lid.  Bake another 10 - 15 minutes without lid.
Take a look at the dough when you remove the lid. If it already looks brown, it might only need another 8 - 10 minutes.  if it's still quite pale it might need another 15 minutes.  Best to set timer for 10 minutes and check it then...you can always leave it in for another 4 or 5 minutes.  If you think it's done, use your oven gloves to lift it out of the pot and check the bottom.  The bottom can burn first...you'll know it’s done by checking the bottom.  
 
Leave on rack to cool and enjoy!

Thoughts:
No need to eat the whole loaf all at once, although you might be tempted. There is nothing like the warm scent of fresh bread that brings me back to a Parisian boulangerie.  Once the bread has cooled, wrap individual slices or two at a time, in wax paper and aluminum foil and place them in a freezer bag. I have several recipes in mind for using the remaining bread slices that I froze. One of them includes a decadent breakfast with Nutella smear and a hot cup of tea. Yum.


Monday, February 25, 2013

Lentil-Kale-Chorizo Winter Stew

Lentil-Kale-Chorizo Winter Stew

WINTER IS COMING. Ok, so maybe winter is on the way out, if the groundhog can be trusted, but it's still mighty cold down here in DC. I am still using my heaviest coats and haven't retired my winter boots yet. I have seen some days where the sun is trying its hardest to dominate, but has lazily given up the struggle by the early afternoon... So I have been trying to make some healthier (and sadly cheese-less...grrr when is Easter already!?) cold-weather hearty meals. I have made this stew before, and it was inspired by my friend Hannah F. who made the original recipe from Smitten Kitchen (I am a big fan!) while I was visiting her up North. She recently made the wedding cake for two dear friend's wedding, and I cannot rave enough about this girl's talents. 
At wedding: Me to Hannah- we're the same amount of tan here! haha modern miracles
Take heed of this warning now: this is not a Single Serving recipe, you probably get about 5-6 servings out of it, but I have a super busy week coming up so I don't have time to do much spontaneous cooking. This is really great to store in some containers you have lying around, as you will see at the bottom like I did. Simply reheat a new serving for 2min 30secs approx and you're good to go. The original calls for more variations of vegetables, but I have a harder time finding use for the extra carrots and celery, and I am too lazy to deal with the garlic infusion at the end (although when Hannah made it, I definitely enjoyed it). The first time I made it, I didn't use any chorizo so I wanted to try it this time with some meat in order to see what extra flavors it added. I ended up using turkey chorizo which I bought at Whole Foods, my health guilt got the better of me in the queue for the butcher. If I make it again with meat, I would go full chorizo next time. I had half a package of lentils from last time I made this, which works about to be a cup per batch of stew. Also, I know I wasn't able to because of Lenten fast commitments, but drizzle some Locatelli or Parmesan cheese on top of each bowl when you are serving- really adds a nice tang.


Don't forget the big ass pot! also, I didn't include it but add salt & pepper to this
Coat bottom in olive oil and brown the meat
My chopping skills need some work still....
Stir up vegetables with the meat
Pour in crushed tomatoes
My Nana only uses Scalafani crushed tomatoes so naturally, I do as well. It makes a difference.
Add remaining ingredients except kale
Bring to a simmer and cook covered for 40 minutes
Chop up Kale and stir it in for a few minutes at the end so it doesn't become soggy
What it looks like when it's done cooking
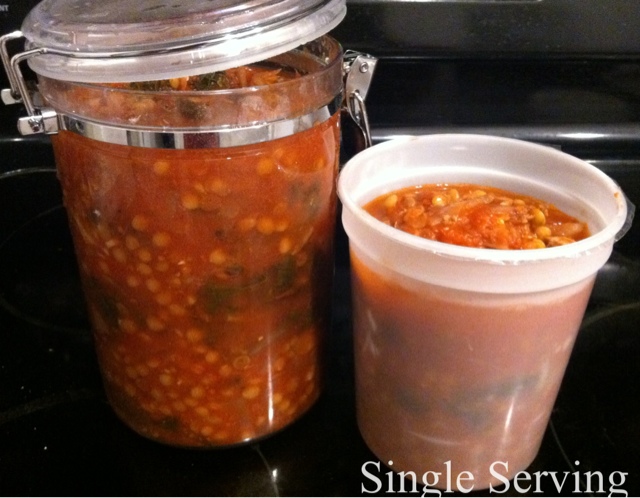
Besides the bowl I ate, this is how much is leftover
I enjoyed with a cider, perfect for a cold winter's night
The Single Serving!
Lentil Kale Chorizo Winter Stew Recipe:
     Ingredients-
    1/4 cup, olive oil
    1or 2, chorizo sausage link(s) (may remove and make it vegetarian-just as delicious)
    1 medium yellow onion, diced

    2 large cloves, garlic, diced
    1 tbs, kosher salt

    1 tps, black pepper
    1 cup, brown lentils, sorted and rinsed
    2, bay leaves
    1 28-ounce can, crushed tomatoes (Scalafani brand is best)
    6 cups, water**

    1 head, kale, chopped
    Grated Italian cheese


**to get the 6 cups-1 empty 28oz can should be filled up twice with water to catch any remaining tomato pulp
     
How To-
Heat olive oil (make sure it is enough to coat bottom of pot) in a large pot on medium heat. While oil is heating, remove the casing from the sausage. When oil is hot, add the sausage by breaking it up with a wooden spoon until it starts to brown, which should be about 5-6 minutes. 

Next, add the onion, garlic cloves, and half a tablespoon of salt (or a couple of grinds on the salt mill). Cook with the sausage until the vegetables soften a bit, another 4-5 minutes. 

Then, add the lentils, bay leaves, tomatoes, water, and remaining salt and black pepper to taste. Stir and bring to a simmer. Cook stew, covered, for about 35-40 minutes or until lentils are soft.

When the lentils are cooked, add the kale and cook for a few minutes until the leaves get tender. Make sure to get rid of the bay leaves. 

If you are living alone like me, then store the remaining soup, once it has cooled, in containers and keep in the fridge for up to 5 days. 

Enjoy!

Thoughts:
I realized while I was making this that my sister would really love this, if I made the vegetarian version again. I didn't enjoy the actual taste of the turkey chorizo as much, so unless I make it with real chorizo next time, I will try to wait and impress my sister with this recipe. The soup keeps really well; I bring it for lunch to work and I have it for dinner. The kale gets a bit soggy so it is possible, if this is something that bothers you, to add the kale individually when reheating each new serving so it's fresh. Frankly, I am too lazy and the taste remains the same- it is only the consistency that changes. 

Speaking of Winter coming, I could see myself holed up in my room eating this during the premiere of Game of Thrones (March 31st! not soon enough). I would imagine I was in the great hall in Winterfell, with a Direwolf tugging at my fur coats, eating this hearty soup. Perfect situation. 

Wednesday, February 20, 2013

Brown Sugar Baked Salmon

    So I have given up cheese for Lent- this is a very hard thing for an Italian, because I am also in turn having to give up on food treasures like pasta and pizza, among other delicious cheesy things. I feel like I could be a better Catholic the rest of the year, so I try to take the season of Lent very seriously. 

That means, until Easter, no cheesy temptations on the blog (meaning I have to put off making my french onion soup, which is simply divine). But as it's Friday, and I can't have red meat (gave that up last year for Lent), I made this salmon over rice for lunch. Besides the salmon, it is likely you will have soy sauce and brown sugar lying around your pantry and it only takes a bit of foil and 15 minutes. Piece of cake.

Also side note- if you put marshmallows in your brown sugar, it keeps the sugar soft and not too clumpy.
Simple Ingredients
Smother in sugar and soy sauce
Bake that shiz
Poof- it's done
The Single Serving!

Brown Sugar Baked Salmon Recipe:
     Ingredients-
    1 1/2 tbs, soy sauce
    2 tbs, brown sugar
    1 filet, salmon


     How To-
Put oven at 350 degrees Fahrenheit. Place salmon inside a foil sheet and coat it in brown sugar. Drizzle the soy sauce so the sugar absorbs it. Wrap in the foil so the sauce cannot escape and place in oven for 15-17 minutes, depending on how crisp you like it. Simple as that!

Enjoy!

Thoughts:
I took this for lunch, as evidenced by the last photo.  It smelled and tasted so good when I pulled it out of the oven, but the microwave reheating didn't do it any favors. Really great quick meal, but I would recommend eating it while it is hot the first time.

Thursday, February 14, 2013

Nutella Buttercream Vanilla Cupcakes- Suck it Valentine


Chubby Baby with that Arrow- Stay Away from Me!
Ok. So it's Valentine's Day and I am single. Not a big deal right? No, it wouldn't be if my dear sister wouldn't stop bombarding me with 'what to do when you're alone on valentine's day' facebook links...actually, they are pretty hilarious.
So is being single on this particular day the absolute worst thing in the world? I don't think so as my dear daddy already sent me bicycle chocolate truffles :) he's the best and it's bicycles! win win. Tonight, the red lipstick is put on, and me and some other single gal pals hit the town, so don't despair! 
Creativity Explored: Bicycles
I might be acting all high and mighty about being ok with Valentine's this year, but I did get into the "Anti" spirit as well and made these Nutella Buttercream Vanilla Cupcakes. I couldn't afford $20 food coloring at Whole Foods, but it actually affirms my point even more- not a drop of Valentine in sight on these puppies! 

My frosting piping definitely needs some work, but this is the first time I have ever done it frankly- and my office thought they were pretty darn tasty, so I approve. I made some mini versions with X's to exemplify the "Anti" sentiment with my Babycakes mini-cupcake maker, but the remainder are large and in charge. 


Nutella was an awesome ingredient to use as the buttercream flavor, and I say this because Nutella makes every broken heart feel better! And, these went perfectly with a cup of lavender white tea in my Papi-Jack's favorite teacup (now vintage).

First the Vanilla Cupcakes:
Cupcake Ingredients
Butter and Sugar
Mix that shiz up
Should look like this after mixing
Add the eggs and vanilla
In a separate bowl, mix the flour and baking powder
Should be pretty goopy by now
Add the milk slowly
Action shot
Et Voila- Batter

BabyCakes Cupcake Maker
Fill Babycakes with batter for minis
Fill cupcake wrappers with batter for oven
Perfectly sized
For the Nutella Buttercream Frosting:
(gloriously copied from Kitchen Treaty)

More ingredients
Beat the powdered sugar and butter (lots of it)
Add the Nutella
Add in salt and vanilla extract
Action shot of 2 minute beating
The Single Serving! (Single on Valentine's serving size-stop judging)
X marks the spot
These selfies were really hard to take-thank god my candle is a good camera stand
TOO CUTE!!
Yea did this photoshoot at 8am, it's obvious


Happy (Anti) Valentine's Day from The Single Serving!
Vanilla Cupcakes Recipe:
     Ingredients-
     1 cup, white sugar
     1/2 cup, butter
     2 eggs
     2 tsp, vanilla extract
     1 1/2 cups, all-purpose flour
     1 3/4 tsp, baking powder
     1/2 cup, milk


     How To-
     Preheat oven to 350 degrees Fahrenheit and place cupcake liners in baking pan.
     In a stand mixer, mix together the sugar and butter. Beat in eggs and add vanilla. Combine flour and baking powder, mixing well. Stir in milk until batter is smooth. The pour into baking pan.
     Bake 20-25 minutes.


Nutella Buttercream Frosting Recipe:
     Ingredients-
    1 cup (2 sticks), unsalted butter, room temperature
    2 cups, powdered sugar
    2/3 cup, Nutella spread
    1 tsp, vanilla extract
    Pinch kosher salt
    2 tbs, heavy whipping cream


     How To- 
    In a stand mixer (KitchenAid), use the paddle attachment. Beat together the butter and powdered sugar on low until well-blended. 
    Add the Nutella and increase the speed to medium. Beat it for two minutes.
    Add the vanilla extract and salt and whip for an additional minute.
    Add the whipping cream and beat for about one minute, until the frosting lightens slightly in both color and texture.

Pipe it like it's hot!

Thoughts:
This took a lot of photo staging.... hard work. But it looks really pretty so I have no complaints.  Cupcakes were moist and fluffy and the buttercream was light and airy. I think next time, I would use just a tad less sugar in the frosting.